
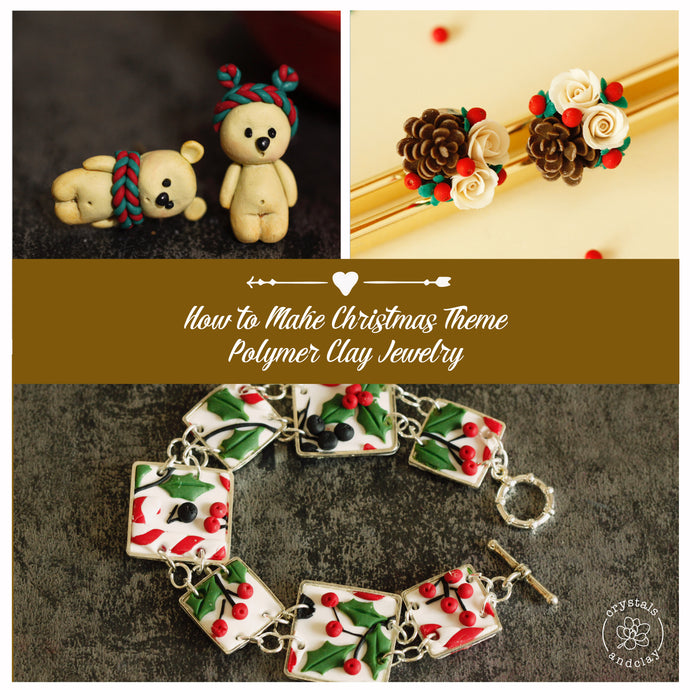
How to make polymer clay teddy bears earring studs…with a Christmas twist

Holiday is finally here! Today I want to share with you how to make polymer clay teddy bears that are only the size of your finger nail. And dressed them up with adorable Christmas knitwear. You can use it to make earrings or a collar pin. It is a perfect little project for Christmas season!

1. Cut the outline
You can download and print the teddy bear paper template here in 1*1.6cm. This is a good size for earring studs or collar pin. Enlarge the template if you are making a brooch.
Roll the polymer clay to 1mm thickness and cut out the bear shape based on the template (picture 1). Since the bear's arms are too small, I skipped them all together when cutting the outline. We'll add them later in the process.
2. Head
Add two layers of polymer clay circles to the head and smooth the edges using your thumb or a rubber tool (picture 2). Raise the cheeks and forehead by adding two oval shapes to the face and blend them together with a rubber tool (picture 7 and 8).
3. Tummy
For the bear tummy, we can add one teardrop and one oval shape to the body and smooth them together (picture 3 and 4).
4. Legs
Cut out leg shapes based on the paper template. Add two small circles between legs and tummy to make sure there is a smooth transition (picture 5). Blend them together using a rubber tool and gently push the clay to the end to emphasize the feet (picture 6).
5. Arms and Ears
Now it's time to add arms and ears to the bear. I wouldn't suggest cutting them using the template since they are extremely small. Shaping them by hand is a much better choice.
Since arms and ears come in pairs, you need to make sure they are the same size. One way to guarantee that is using a cake piping tip to cut small circles from polymer clay; then use same number of circles for each arm or ear.
6. Face
Mark the eyes, nose and mouth using a needle tool (picture 10) and attach tiny pieces of black polymer clay to the marked places.
Before moving on to the next step, I want to discuss a question lots of polymer clay hobbyists have: Why my polymer clay animal doesn't look cute? The answer is quite simple: because it doesn't have features of a baby.
Now, think of a baby you know and let's summarize his/her facial and body features in high level.
1. babies' eyes usually locate in the lower half of his/her face.
2. babies usually have plump cheeks, forehead and belly.
3. babies head/body ratio is much larger than adults. We can amplify this feature even more when crafting.
Keep in mind those characters. They are the secret gateways to "cuteness".

7. Knitted Scarves
To make our teddy bears more festive for the holiday season, I designed polymer clay knitted scarves and hats for them to wear. This is a simple yet realistic polymer clay trick. You can use the knitting pattern as scarves, hats or sweaters. I have so much fun playing with it.

Bake
Bake the whole thing in the oven at 110C/230F for 30 minutes. When they are ready to use, attach the earring post, or collar pin to it using super glue.
Now you have it! Your perfect little winter companion! Hope those adorable and festive polymer clay teddy bears can bring joy to your heart.
Recommended Posts:


Product Used In This Project
-
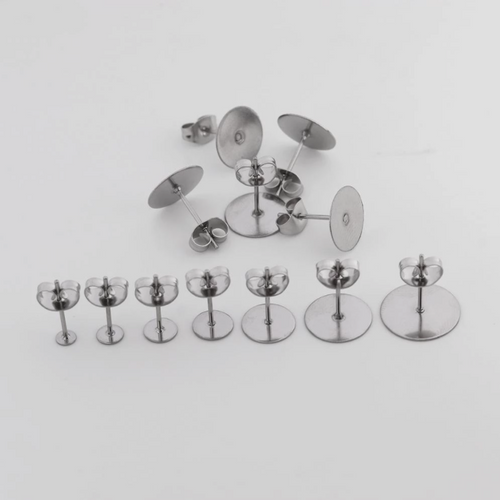
3/4/5/6/8/10/12mm 100pcs Stainless Steel Silver Earring Posts with Earring Backs
![3/4/5/6/8/10/12mm 100pcs Stainless Steel Silver Earring Posts with Earring Backs]()
- Regular price
- $5.75
- Sale price
- $5.75
- Unit price
- per


